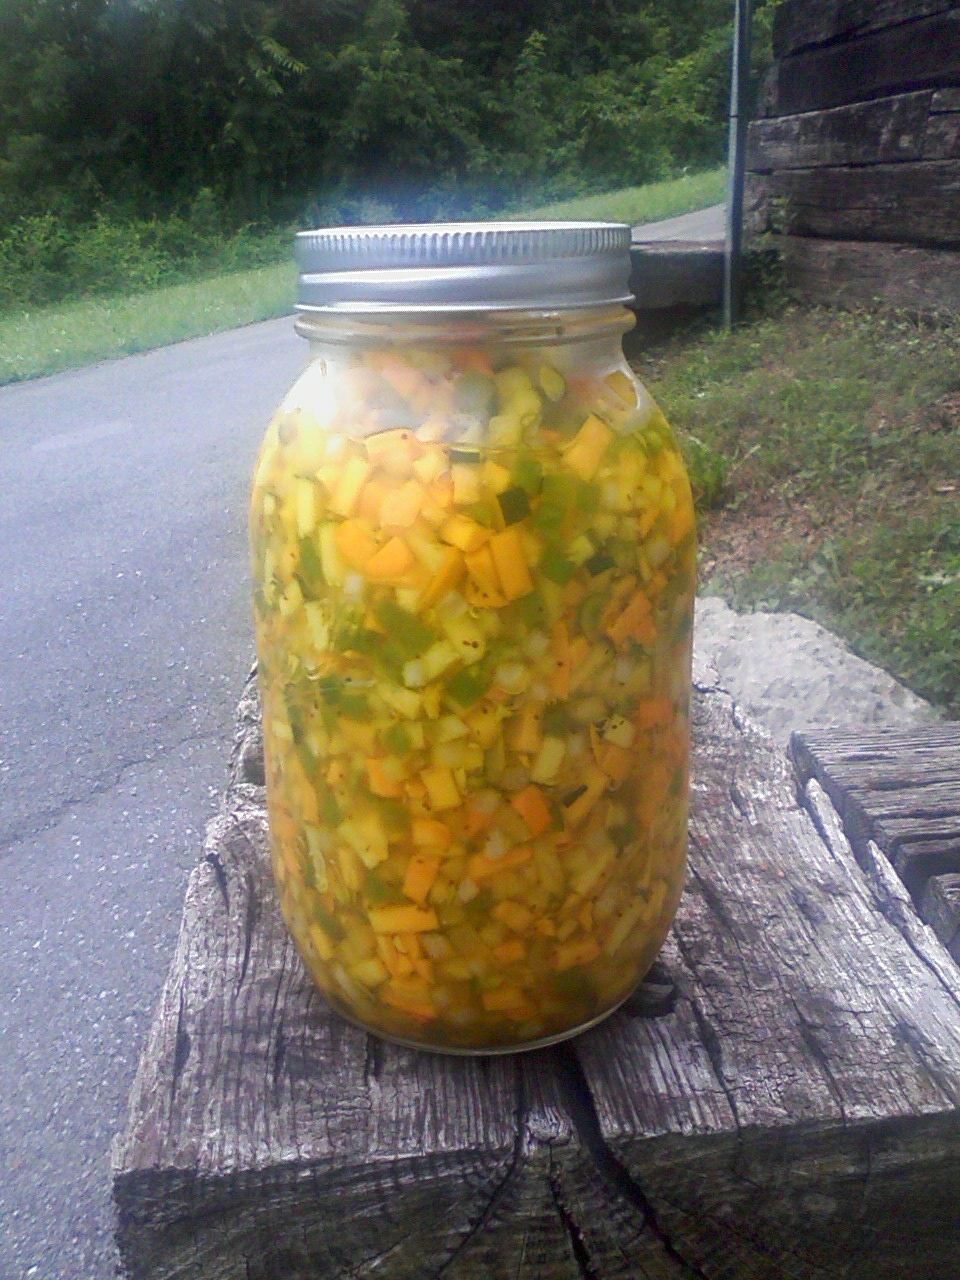
OK, the winter is upon us and nothing is better than soup in the winter to keep warm, well that and a little shot of "what-not", anyway I made this "chowdah" and it is really tasty and fairly simple. This is great with my Garlic-Cheddar Bay Biscuits all slathered with butter. I will include that recipe too!
You'll find that this soup is similar to a New England Clam Chowder and you could actually use this as a base for that. You can leave the fish out and add more potatoes and have a savory potato soup. Get creative and swap out the fish for lump crab meat, peeled and cleaned crawfish tails, or even oysters. There is no limit to what you can do with this soup. Have fun and keep each other warm.
Fish and Potato Chowder
1 lb fish filets
2 cups red potatoes (small dice)
1 stalk celery (thin sliced)
2 cups onions (small dice)
3 - 4 cloves of garlic (minced fine)
5 green onions (sliced thin)
4 - 5 cups water
1 chicken stock cube
2 cups milk
¼ stick butter
2 tbs plain flour
2 tbs olive oil
¼ cup sour cream
½ tsp each black pepper and sea salt
1 tbs Tony Chachere's
½ tsp turmeric
½ tsp garlic powder
¼ tsp cayenne
2 bay leaves
¼ tsp nutmeg
1 tbs minced parsley
In a med size pot, bring the water up to a boil, add the stock cube and the potatoes and cook for about 10 - 15 mins until potatoes are done. Keep warm. In a larger stock pot, melt the butter, add the olive oil, and sauté the onions, garlic, celery and green onions all together. Add the bay leave and all the spices. Cook for about 10 mins or until onions are softened.
Add the flour and stir for about 5 - 6 mins until flour starts to brown a bit. Now bring the potatoes and stock water up to temp again and pour into the other pot with the veggies. Stir well to dissolve the flour roux you've made. Bring up to a boil and add the milk and sour cream, stirring well to dissolve the sour cream. Now add the fish which has been diced into small bite sized pieces, stir well. Turn down to MED, cover, and let cook for about an hour, stirring occaisionally to insure its not scorching and sticking to the bottom of the pot.
I like serving this with some old fashioned saltine crackers and a little hot sauce. In the picture you'll notice I have added a dried red pepper. This added a small amount of heat, but I took it out before storing it in the fridge. This is an amazing soup I'd like for you to try. As for fish to use, you can use catfish, cod, flounder, talapia, or haddock, all very mild and tasty. I buy a mild white fish at WalMart that I really like called Swai, it's a Vietnamese Catfish and is WONDERFUL! Very tasty and mild. Be sure to use about 3 of these filets, about 6 oz. each and individually wrapped and frozen. Thaw them in the sealed wrapper in a sink of warm water. About 5 mins.
Garlic-Cheddar Bay Biscuits Recipe
1 ¼ cup biscuit mix
½ cup grated cheddar cheese
½ cup milk
½ stick butter
¼ tsp garlic salt
¼ tsp dried parsley flakes
Preheat the oven to 400º Spray cookie sheet with cooking spray. Combine the biscuit mix and cheese in a bowl. Add the milk and stir just until combined. The dough will be slightly moist. Drop the dough by tablespoonfuls onto the prepared baking sheet. Bake for about 10 minutes, until the biscuits are firm and beginning to brown.
While the biscuits are baking, make the garlic butter. In a small microwave or on the stove, melt the butter, add the garlic salt, and parsley flakes. Mix well. As soon as you bring the biscuits from the oven, brush them with the garlic butter using a pastry brush.
Enjoy these two wonderful recipes on those cold winter nights to ease the chill.
RouxBDoo
Friday, January 11, 2013
Saturday, January 5, 2013
Jamaican me Patties Mon!
For all the years I travelled working on the cruise ships I have always loved the different cuisines of the Caribbean Islands. One of my favorite treats that I could always find at the airports were Jamaican Meat Patties. I had found them here in the freezer section of my local grocery, but they were just not the same. So I decided to try and make my own. Now I will warn you this is a bit involved, but it is worth it. The key to the success is the light flaky pastry you make for the crust. This is not only flaky but has a savory flavor with a hint of aromatic spice.
You start with your filling, now there are many variations you can use. I used beef, but you could use chicken, pork, or I even thought this would be wonderful with crabmeat as a filling. One of the favorites is lamb. If you can find ground lamb your on your way to Tastyville. (Tastyville is 6 miles west of Guy Fieri's Flavor Town) Any meat you can have ground would work. I supposed deer or turkey would be fine although I have never been a fan of ground turkey. You can also go the indian route and stir up some lumpy mashed potatoes with some nice spices and curry powder and use that as well.
If you follw the simple directions for making the filling you can use about any meat, you do not need to cook the crab as much as the others. Even fish filets can be minced up in your pan as you are sautéing the onions and garlic. The bread crumbs help bind whatever it is you are using for the meat in these patties.
Pastry Crust
2 cups plain flour
½ stick of butter (very cold)
⅔ cup of shortening
1 tbs curry powder
½ tsp turmeric
¼ tsp cayenne pepper
¼ tsp salt (I use yellow popcorn salt)
⅓ cup of ice water
Pattie Filling
1 lb ground beef (or any meat)
1 small onion (diced small)
4 green onions (sliced very thin)
3-4 cloves of garlic (minced)
2 tbs oil
2 tbs Curry powder
½ tsp turmeric
½ tsp cumin
¼ tsp cayenne
¼ tsp nutmeg
½ tsp salt & pepper (each)
½ cup breadcrumbs
2 tbs flour
½ cup of water
1 egg + 1 tbs water for egg glaze
In a mixing bowl sift together all the dry ingredients for the crust, one combined thoroughly, add your shortening and butter. I dice the butter in small cubes to help mix it easier. Using your pastry blender, have a go at the until it looks like coarse wet sand. Add the ice cold water and work it in. Dump pastry onto sheet of plastic wrap, roll it into a loaf-like shape and seal well with plastic. Put in the fridge for about and hour.
Saute the onions, green onions, and garlic in a pan in the 2 tbs of oil. When wilted, add the meat and stir and mash until me is broken up. Add spices and cook until meat is done. Add breadcrumbs and sprinkle the 2 tbs of flour over the meat and stir it in. Now add ½ cup of warm water to help the binders thicken the meat. Let this cool and take out your Pastry dough.
Divide the pastry into 8 even pieces. Roll each piece into a ball and then onto the board it goes. I use clear wrap on the top and bottom of the rolling process. Roll the dough out to approx. a 6 in. circle. Brush the inside with an egg glaze, then add about a ¼ - ⅓ cup of the filling meat. Fold the pastry over and crimp the edges with a fork. Place these onto a sprayed cookie sheet, brush the tops with the egg glaze, and into a 350º oven for between 15 - 20 mins. Let these cool before eating them.
Give these a try, take your time and you will be pleased with the tasty results. Enjoy!
RouxBDoo
You start with your filling, now there are many variations you can use. I used beef, but you could use chicken, pork, or I even thought this would be wonderful with crabmeat as a filling. One of the favorites is lamb. If you can find ground lamb your on your way to Tastyville. (Tastyville is 6 miles west of Guy Fieri's Flavor Town) Any meat you can have ground would work. I supposed deer or turkey would be fine although I have never been a fan of ground turkey. You can also go the indian route and stir up some lumpy mashed potatoes with some nice spices and curry powder and use that as well.
If you follw the simple directions for making the filling you can use about any meat, you do not need to cook the crab as much as the others. Even fish filets can be minced up in your pan as you are sautéing the onions and garlic. The bread crumbs help bind whatever it is you are using for the meat in these patties.
Pastry Crust
2 cups plain flour
½ stick of butter (very cold)
⅔ cup of shortening
1 tbs curry powder
½ tsp turmeric
¼ tsp cayenne pepper
¼ tsp salt (I use yellow popcorn salt)
⅓ cup of ice water
Pattie Filling
1 lb ground beef (or any meat)
1 small onion (diced small)
4 green onions (sliced very thin)
3-4 cloves of garlic (minced)
2 tbs oil
2 tbs Curry powder
½ tsp turmeric
½ tsp cumin
¼ tsp cayenne
¼ tsp nutmeg
½ tsp salt & pepper (each)
½ cup breadcrumbs
2 tbs flour
½ cup of water
1 egg + 1 tbs water for egg glaze
In a mixing bowl sift together all the dry ingredients for the crust, one combined thoroughly, add your shortening and butter. I dice the butter in small cubes to help mix it easier. Using your pastry blender, have a go at the until it looks like coarse wet sand. Add the ice cold water and work it in. Dump pastry onto sheet of plastic wrap, roll it into a loaf-like shape and seal well with plastic. Put in the fridge for about and hour.
Saute the onions, green onions, and garlic in a pan in the 2 tbs of oil. When wilted, add the meat and stir and mash until me is broken up. Add spices and cook until meat is done. Add breadcrumbs and sprinkle the 2 tbs of flour over the meat and stir it in. Now add ½ cup of warm water to help the binders thicken the meat. Let this cool and take out your Pastry dough.
Divide the pastry into 8 even pieces. Roll each piece into a ball and then onto the board it goes. I use clear wrap on the top and bottom of the rolling process. Roll the dough out to approx. a 6 in. circle. Brush the inside with an egg glaze, then add about a ¼ - ⅓ cup of the filling meat. Fold the pastry over and crimp the edges with a fork. Place these onto a sprayed cookie sheet, brush the tops with the egg glaze, and into a 350º oven for between 15 - 20 mins. Let these cool before eating them.
Give these a try, take your time and you will be pleased with the tasty results. Enjoy!
RouxBDoo
Friday, January 4, 2013
We're making Potato Cakes!
Growing up, one of my favorite things my Mom would fix were potato cakes. I knew when she made mashed potatoes with a meal and made A LOT OF THEM, we were having potato cakes the next day. You can make them from scratch mashed potatoes or instant. The key is to let them rest for a day or so in the fridge and let them set up. These things are WONDERFUL.
These potato cakes are different from latke in that these are made from mashed potatoes whereas latke are made with grated potato. I do not put onion in mine, but you can. I would suggest sautéing it first to take the bite out. When making your mashed potatoes do not put butter or cream in them as they will be hard to handle. If you are using leftovers with butter and cream already in them, just add a bit more flour.
Potato Cakes
5 - 6 cups of mashed potatoes
1 cup of plain flour
1 tsp Tony Chachere's Seasoning
1 tsp salt
1 tsp pepper
2 eggs (beaten)
Cooking oil
Extra flour for dusting
Mix all this together in a bowl. The flour should bind it all together. If it feels to loose, just add a bit more flour. Roll these out into balls (about the size of a tennis ball) and dust them with flour. In a cast iron skillet (preferably) heat about a ¼ inch of oil on MED/HI. WHen the oil is hot gently place them into the oil and give them a little pat to flatten them out a bit. Not too thin or they are hard to turn. Let them fry until the underside is brown and flip them carefully. Let them brown on the other side and you're done. Serve with sour cream and minced green onions if you'd like.
I hope you enjoy these tasty potato concoctions, I love them. I work in a dinner theater that serves GREAT mashed potatoes, I get some from Chef at times and take them home to make these. I am trying to do more on my blog here lately. I have a new iPhone with a really nice camera, better than the old one, and I am enjoying posting these recipes for you.
Enjoy!
RouxBDoo
These potato cakes are different from latke in that these are made from mashed potatoes whereas latke are made with grated potato. I do not put onion in mine, but you can. I would suggest sautéing it first to take the bite out. When making your mashed potatoes do not put butter or cream in them as they will be hard to handle. If you are using leftovers with butter and cream already in them, just add a bit more flour.
Potato Cakes
5 - 6 cups of mashed potatoes
1 cup of plain flour
1 tsp Tony Chachere's Seasoning
1 tsp salt
1 tsp pepper
2 eggs (beaten)
Cooking oil
Extra flour for dusting
Mix all this together in a bowl. The flour should bind it all together. If it feels to loose, just add a bit more flour. Roll these out into balls (about the size of a tennis ball) and dust them with flour. In a cast iron skillet (preferably) heat about a ¼ inch of oil on MED/HI. WHen the oil is hot gently place them into the oil and give them a little pat to flatten them out a bit. Not too thin or they are hard to turn. Let them fry until the underside is brown and flip them carefully. Let them brown on the other side and you're done. Serve with sour cream and minced green onions if you'd like.
I hope you enjoy these tasty potato concoctions, I love them. I work in a dinner theater that serves GREAT mashed potatoes, I get some from Chef at times and take them home to make these. I am trying to do more on my blog here lately. I have a new iPhone with a really nice camera, better than the old one, and I am enjoying posting these recipes for you.
Enjoy!
RouxBDoo
Thursday, January 3, 2013
Bake them Biscuits Brown!
I LOVE BISCUITS!!! Now I have posted other biscuit recipes of mine and people have loved them. I normally eschew mixes of any type unless a recipe specifically calls for one. My 89 yr. old mother gave me a bag of this stuff that was recommended by a friend of hers. Its called "Redi-Mix Formula L Biscuit Mix" and I think it makes about the best tasting biscuits I have ever eaten. Someone told me the other day they made biscuits all the time. I said "Oh really", she then said "well from a can". I use a can too but I use it to cut the biscuits out and lay them on the pan.
This fine biscuit mix is produced by Midstate Mills in Newton North Carolina, but you can find it in some stores, I wrote the company and they gave me some places to look. I buy mine at Food Country USA, here in Tennessee, (they have other locations in Southwest Virginia) but I am sire you can find Midstate Mills products all over. You can also mail-order the products from the Mill's website. You really want to try this stuff if you are a biscuit lover. Your friends and family will swear you got these pretty biscuits from a chain store or a "biscuit oriented" fast food joint. Either way, they are awesome. What makes them so good are the dehydrated chips of butter and shortening mixed into the flour. You see little specs of butter in the finished biscuit.
Now, do yourself a favor and get you one of these pastry blenders. I know your Mama never had nor needed one but it makes this all that much easier. I got mine at the huge discount store whose name begins with WalMart. I take 3 cups of Formula-L, one cup of Whole Buttermilk, and mix them together thoroughly. Turn dough out onto a floured surface, knead it about ten times, roll it out with a rolling pin, cut out biscuits, lay them on a cookie sheet (sprayed with Pam), throw them in a 400º oven for about 12 minutes. That's it, they are ready and delicious. Slather them with butter, honey, or jelly.
Enjoy
This fine biscuit mix is produced by Midstate Mills in Newton North Carolina, but you can find it in some stores, I wrote the company and they gave me some places to look. I buy mine at Food Country USA, here in Tennessee, (they have other locations in Southwest Virginia) but I am sire you can find Midstate Mills products all over. You can also mail-order the products from the Mill's website. You really want to try this stuff if you are a biscuit lover. Your friends and family will swear you got these pretty biscuits from a chain store or a "biscuit oriented" fast food joint. Either way, they are awesome. What makes them so good are the dehydrated chips of butter and shortening mixed into the flour. You see little specs of butter in the finished biscuit.
Now, do yourself a favor and get you one of these pastry blenders. I know your Mama never had nor needed one but it makes this all that much easier. I got mine at the huge discount store whose name begins with WalMart. I take 3 cups of Formula-L, one cup of Whole Buttermilk, and mix them together thoroughly. Turn dough out onto a floured surface, knead it about ten times, roll it out with a rolling pin, cut out biscuits, lay them on a cookie sheet (sprayed with Pam), throw them in a 400º oven for about 12 minutes. That's it, they are ready and delicious. Slather them with butter, honey, or jelly.
Enjoy
Thursday, December 27, 2012
Creamy Chicken and Rice
It's winter outside and time for some of my favorite comfort foods. One of my favorites is my Creamy Chicken and Rice. I guess technically it is a casserole, but not in the "just throw everything in a baking dish" sense. I always try and save half of a rotisserie chicken for this when I buy one. I use the rotisserie chicken because of it's wonderful flavor it imparts to the dish. I also use these tasty chickens in my Jambalaya recipe as well. I have to say that Walmart has about the best rotisserie chickens I have found.
I have several other "Chicken and Rice" dishes but this one is my favorite. My Mom used to make one that was the inspiration for this version. I added a touch of cayenne and a little more garlic than you might like, I like it a little spicy. You can leacve out the chicken and substitute other types of cream soups like celery and mushroom if you want to use this as a side dish with your chicken or whatever.
2-3 cups cooked chicken meat
1½ cups water
1½ cups uncooked rice
2 10 oz. cans of Cream of Chicken Soup
½ large onion (diced small)
2 sticks celery (sliced thin)
4-5 cloves of garlic (minced fine)
3 green onions (with green tops, sliced thin)
2 bay leaves
1 tsp Tony Chachere's
½ tsp salt
½ tsp black pepper
¼ tsp cayenne pepper
1 tbs minced parsley (dried or fresh)
¼ stick butter
2 tbs oil
Preheat oven to 350º, then in an oven-proof pot (with a lid) on the stove at MED heat, saute the onions and celery in the butter and oil. When wilted, add green onions, garlic, and all seasonings. Cook 5 mins., then add chicken and cook for another 5 mins. Add water and bring to a boil. Add the rice and stir well to incorporate. Cook until rice has nearly absorbed all the liquid. Add the soup and stir well to make sure all is blended well. Place covered in the oven for 45 mins. to an hour. Rice should be done and tender with a nice bubbly crust on top. Let it steam for about 10 mins and serve.
I always use my left over rotisserie chicken for this recipe. I usually have about half a chicken, the thighs and one side of the breast meat, left over for this recipe. If you use fresh chicken, make sure it is cooked done before adding rice. You can omit the oil and add more butter, but be careful not to burn your vegetables when you sauté them, the oil helps prevent that.
Enjoy this dish during the winter months to take the chill off, I think you'll love the richness of it.
RouxBDoo
I have several other "Chicken and Rice" dishes but this one is my favorite. My Mom used to make one that was the inspiration for this version. I added a touch of cayenne and a little more garlic than you might like, I like it a little spicy. You can leacve out the chicken and substitute other types of cream soups like celery and mushroom if you want to use this as a side dish with your chicken or whatever.
2-3 cups cooked chicken meat
1½ cups water
1½ cups uncooked rice
2 10 oz. cans of Cream of Chicken Soup
½ large onion (diced small)
2 sticks celery (sliced thin)
4-5 cloves of garlic (minced fine)
3 green onions (with green tops, sliced thin)
2 bay leaves
1 tsp Tony Chachere's
½ tsp salt
½ tsp black pepper
¼ tsp cayenne pepper
1 tbs minced parsley (dried or fresh)
¼ stick butter
2 tbs oil
Preheat oven to 350º, then in an oven-proof pot (with a lid) on the stove at MED heat, saute the onions and celery in the butter and oil. When wilted, add green onions, garlic, and all seasonings. Cook 5 mins., then add chicken and cook for another 5 mins. Add water and bring to a boil. Add the rice and stir well to incorporate. Cook until rice has nearly absorbed all the liquid. Add the soup and stir well to make sure all is blended well. Place covered in the oven for 45 mins. to an hour. Rice should be done and tender with a nice bubbly crust on top. Let it steam for about 10 mins and serve.
I always use my left over rotisserie chicken for this recipe. I usually have about half a chicken, the thighs and one side of the breast meat, left over for this recipe. If you use fresh chicken, make sure it is cooked done before adding rice. You can omit the oil and add more butter, but be careful not to burn your vegetables when you sauté them, the oil helps prevent that.
Enjoy this dish during the winter months to take the chill off, I think you'll love the richness of it.
RouxBDoo
Saturday, December 22, 2012
Scottish Shortbread for Christmas
Here is a quick traditional Scottish recipe for Christmas. One of my family's favorite Holiday recipes. A friend from Scotland taught me this recipe. Merry Christmas!
Scottish Shortbread
2 cups all-purpose flour - sifted
½ cup powdered sugar
¼ tsp salt
1 cup real butter - softened
Preheat oven to 325º. Sift flour, sugar, and salt together in a bowl. Gradually add butter into the mixture and combine with pastry blender or a fork. Pat mixture onto an un-greased cookie sheet. Pat it out thin and pierce with a fork about every inch. bake for 20 to 25 minutes. Cut into squares and sprinkle with colored sugar while still warm.
RouxBDoo
Scottish Shortbread
2 cups all-purpose flour - sifted
½ cup powdered sugar
¼ tsp salt
1 cup real butter - softened
Preheat oven to 325º. Sift flour, sugar, and salt together in a bowl. Gradually add butter into the mixture and combine with pastry blender or a fork. Pat mixture onto an un-greased cookie sheet. Pat it out thin and pierce with a fork about every inch. bake for 20 to 25 minutes. Cut into squares and sprinkle with colored sugar while still warm.
RouxBDoo
Monday, December 17, 2012
Leapin Lizzards! It's Gizzards
When most people hear the word gizzard in relation to Southern cooking, they automatically think of Granny from the BEverly Hillbillies who often spoke of Crow Gizzards, Hawk Gizzards, etc. when she rattled off her daily menu for the family. The lowly gizzard is something I eschewed for most of my life. Up until 2 years ago, I had never eaten a gizzard. Now I've had livers, which I am not too fond of, maybe the texture or the organ meat twang, but never a gizzard.
I had seen an episode of Diners, Drive-Ins, and Dives, with Guy Fieri, about a place called Joe's Gizzard City. They were frying up gizzards by the bucket-full for their patrons who were putting them away. So I thought I would give them a try. After a little experimentation, I have come up with my own recipe. Now I will warn you GIZZARDS ARE CHEWY! I do not par-boil or pressure-cook my gizzards, but I do have a step that helps to tenderize them and mellow out their taste a little.
I am finding when I buy gizzards, it's usually Tyson, they come with hearts. The heart is a nice little less-chewy tidbit that is like a little bonus. I wash them thoroughly and look for any yellowish-green skin that pulls right off, this doesn't occur very often maybe 1 piece per pound if that many. Just peel it off and throw it away. I soak 1 pound of them in a cup or so of buttermilk, overnight in the fridge to ready them for action. I then drain and shake off the excess buttermilk, (I really give them a shaking in a sieve or strainer, you don't want them dripping), let them sit on a plate and dry for a bit to bring them up to nearly room temperature. I dust them in the flour mixture and pan fry them. Here's what you need...
Fried Chicken Gizzards
1 lb chicken gizzards with/without hearts
3 cups of flour
1 cup cornmeal (I like yellow)
3-4 tbs Tony Chachere's Cajun Seasoning
1 tbs garlic powder
1 tbs black pepper
1 tsp cayenne pepper
1-1½ cup buttermilk + 2 tbs salt added to buttermilk
enough oil for half inch in cast iron skillet.
First, soak the gizzards overnight in a zip-lock bag with buttermilk and salt. Remove from fridge and drain really well, DON'T RINSE, and lay out on plate to dry and come up to room temp.
Combine all dry ingredients in a large zip-lock plastic bag. Take gizzards and dredge them in flour mixture. toss them around with bag zip-locked making sure they are well coated. Leave them in bag and start your oil heating in skillet on MED/HI. When oil is really hot, (pinch off and test a small bit of coating from one of the gizzards) use a sieve or strainer to shake off excess flour mixture. One at a time ease the gizzards into the hot oil.
You might want to fry them in two batches so as not to overcrowd the skillet. Overcrowding lowers the oil temp and they do not fry as well. Cook until nice and brown on the outside, turning them as they cook. I like to put them on a rack and keep in a warm over for about 20 mins. I think this helps tenderize them. Get ready for some chewing, but it's good chewing!
Dipping Sauce
4 tbs mayo
4 tbs sour cream
1 tbs yellow mustard
1 tsp Tony Chachere's
1 tbs apple cider vinegar
1 tsp smoky paprika (opt.)
1 tsp tabasco or Sambal Chili Sauce
Combine all ingredients and enjoy dipping your Gizzards. You might want to try my Jezebel Sauce Recipe with these as well. You can pressure cook your gizzards in water and spices, or par-boil them but I like them just fine like this. If you have a deep fryer, they will turn out great. Have fun making Gizzards, the good news is... THEY'RE CHEAP!!! Enjoy!
I had seen an episode of Diners, Drive-Ins, and Dives, with Guy Fieri, about a place called Joe's Gizzard City. They were frying up gizzards by the bucket-full for their patrons who were putting them away. So I thought I would give them a try. After a little experimentation, I have come up with my own recipe. Now I will warn you GIZZARDS ARE CHEWY! I do not par-boil or pressure-cook my gizzards, but I do have a step that helps to tenderize them and mellow out their taste a little.
I am finding when I buy gizzards, it's usually Tyson, they come with hearts. The heart is a nice little less-chewy tidbit that is like a little bonus. I wash them thoroughly and look for any yellowish-green skin that pulls right off, this doesn't occur very often maybe 1 piece per pound if that many. Just peel it off and throw it away. I soak 1 pound of them in a cup or so of buttermilk, overnight in the fridge to ready them for action. I then drain and shake off the excess buttermilk, (I really give them a shaking in a sieve or strainer, you don't want them dripping), let them sit on a plate and dry for a bit to bring them up to nearly room temperature. I dust them in the flour mixture and pan fry them. Here's what you need...
Fried Chicken Gizzards
1 lb chicken gizzards with/without hearts
3 cups of flour
1 cup cornmeal (I like yellow)
3-4 tbs Tony Chachere's Cajun Seasoning
1 tbs garlic powder
1 tbs black pepper
1 tsp cayenne pepper
1-1½ cup buttermilk + 2 tbs salt added to buttermilk
enough oil for half inch in cast iron skillet.
First, soak the gizzards overnight in a zip-lock bag with buttermilk and salt. Remove from fridge and drain really well, DON'T RINSE, and lay out on plate to dry and come up to room temp.
Combine all dry ingredients in a large zip-lock plastic bag. Take gizzards and dredge them in flour mixture. toss them around with bag zip-locked making sure they are well coated. Leave them in bag and start your oil heating in skillet on MED/HI. When oil is really hot, (pinch off and test a small bit of coating from one of the gizzards) use a sieve or strainer to shake off excess flour mixture. One at a time ease the gizzards into the hot oil.
You might want to fry them in two batches so as not to overcrowd the skillet. Overcrowding lowers the oil temp and they do not fry as well. Cook until nice and brown on the outside, turning them as they cook. I like to put them on a rack and keep in a warm over for about 20 mins. I think this helps tenderize them. Get ready for some chewing, but it's good chewing!
Dipping Sauce
4 tbs mayo
4 tbs sour cream
1 tbs yellow mustard
1 tsp Tony Chachere's
1 tbs apple cider vinegar
1 tsp smoky paprika (opt.)
1 tsp tabasco or Sambal Chili Sauce
Combine all ingredients and enjoy dipping your Gizzards. You might want to try my Jezebel Sauce Recipe with these as well. You can pressure cook your gizzards in water and spices, or par-boil them but I like them just fine like this. If you have a deep fryer, they will turn out great. Have fun making Gizzards, the good news is... THEY'RE CHEAP!!! Enjoy!
Wednesday, December 12, 2012
Making Sausage Cornbread
I told you last time we would be doing Sausage Cornbread as a follow-up for my cornbread recipe, well here it is. My buddy and fellow banjo player Tucker McCandless loves this sausage cornbread, and I fix it every so often and take him some, his Mama Cassie likes it too. I am going to repeat my cornbread recipe so you don't have to keep scrolling around the blog looking for it. I do this in two different skillets, the reason is frying sausage seems to stick in my cast iron skillet, plus I like to keep it nice and slick for cornbread. I use quite a large skillet (11 in. across the top) and use whatever saute pan for the sausage and onions.
The sausage filling consists of...
1 lb country breakfast sausage (broken up)
1 med onion (diced)
8 - 10 leaves of fresh dried sage (rough chop)
4 green onions (sliced thin with green)
The sausage filling consists of...
1 lb country breakfast sausage (broken up)
1 med onion (diced)
8 - 10 leaves of fresh dried sage (rough chop)
4 green onions (sliced thin with green)
½ tsp red pepper flakes (opt)
½ tsp garlic powder
½ tsp black pepper
Crumble up the sausage and combine with all other ingredients into the saute pan and cook until sausage is done. Drain grease and set aside to cool.
Now for the Cornbread
2 cups yellow cornmeal (I like martha White)
1 tsp Tony Chachere's Cajun Seasoning
1 tsp parsley flakes
3 eggs
1 ¼ cups buttermilk
2 tbs oil (I like corn oil)
2 tbs bacon grease
Put bacon grease in a cast iron skillet, and place in a preheated 425º oven for 10 mins. Mix first 3 dry ingredients thoroughly in a bowl with a whisk. Mix next 3 wet ingredients in another bowl or big measuring cup. Combine wet and dry using whisk. Add sausage mixture and combine thoroughly.
Remove skillet from oven. Pour batter mix into melted, hot bacon grease and give the skillet a little shake to settle the mix. Bake for 15 mins. or so until top of the cornbread browns a little and you cap tap the top and feel it is solid. Tucker I hope your Mama dont see this or she'll do it better than me, you won't want mine anymore. I got this dish from my dearly departed Aunt Stella Yeary Burnette. She was one of the best cooks ever. I love her and miss her. She taught me a lot in her kitchen and when she'd come over to mine. This was my favorite of her specialties.
½ tsp garlic powder
½ tsp black pepper
Crumble up the sausage and combine with all other ingredients into the saute pan and cook until sausage is done. Drain grease and set aside to cool.
Now for the Cornbread
2 cups yellow cornmeal (I like martha White)
1 tsp Tony Chachere's Cajun Seasoning
1 tsp parsley flakes
3 eggs
1 ¼ cups buttermilk
2 tbs oil (I like corn oil)
2 tbs bacon grease
Put bacon grease in a cast iron skillet, and place in a preheated 425º oven for 10 mins. Mix first 3 dry ingredients thoroughly in a bowl with a whisk. Mix next 3 wet ingredients in another bowl or big measuring cup. Combine wet and dry using whisk. Add sausage mixture and combine thoroughly.
Remove skillet from oven. Pour batter mix into melted, hot bacon grease and give the skillet a little shake to settle the mix. Bake for 15 mins. or so until top of the cornbread browns a little and you cap tap the top and feel it is solid. Tucker I hope your Mama dont see this or she'll do it better than me, you won't want mine anymore. I got this dish from my dearly departed Aunt Stella Yeary Burnette. She was one of the best cooks ever. I love her and miss her. She taught me a lot in her kitchen and when she'd come over to mine. This was my favorite of her specialties.
Friday, November 30, 2012
French Market Coffee Company
While in New Orleans, one of the features of its cuisine is the coffee. Second only to the food, beverages are an important part of the tourist economy, and brewing and serving coffee is a fine art in restaurants and shops, especially around the French Quarter.
There are several popular outlets for coffee that people look to once they hit town, but some of the best coffee I have found is also one I have had in my home, and that's French market Coffees. I love and crave all those flavors of the Big Easy, but now I can get great coffee that reminds me of my days strolling along through town sampling its wares.
I have tried the blue packaged Dark Roast, as well as the green Decaffeinated coffee. Now, I have been trying to use decaf for a while, maybe every other cup I have is decaffeinated. Many decaf coffees fall short, but not French Market. It is as bold and robust as any brands of regular caffeinated coffee, as well as their regular coffee.
I love strong, dark tasting coffee and these coffees are never bitter, but give you that New Orleans influenced flavor. They also have chicory coffee that is one of my favorites as well. They also have the following speciality coffees...
Double Vanilla
A decadent vanilla flavor and enticing aroma make this coffee the perfect treat.
Guatemalan Medium Roast
This single-source coffee gives a delightful, full-bodied cup with well-balanced acidity.
Hazelnut Creme
We add hazelnut and a touch of creamy vanilla to our signature Medium Roast for a taste that's truly indulgent.
New Orleans French Roast
This careful blend of Indonesian, African, and South American beans creates a flavor as complex as New Orleans itself.
Arabica Coffee with Pralines and Cream Flavor
In this premium coffee, you'll find notes of roasted pecans, caramelized sugar, and a touch of cream.
The Bartlett and Dodge families started French Market Coffee in 1890, in New Orleans’ bustling French Market. To this day they continue to roast the choicest Arabica beans and specially grind them to create the quintessential New Orleans coffee. It is also served in the city’s finest restaurants, many of which have been serving French Market Coffee for over 100 years.
Click HERE and find out how you can try their amazing coffees in your home, you'll be glad you did. This is an unpaid testimonial because I love their products, and I know you will too.
Be sure to see their products and like them on Facebook.
There are several popular outlets for coffee that people look to once they hit town, but some of the best coffee I have found is also one I have had in my home, and that's French market Coffees. I love and crave all those flavors of the Big Easy, but now I can get great coffee that reminds me of my days strolling along through town sampling its wares.
I have tried the blue packaged Dark Roast, as well as the green Decaffeinated coffee. Now, I have been trying to use decaf for a while, maybe every other cup I have is decaffeinated. Many decaf coffees fall short, but not French Market. It is as bold and robust as any brands of regular caffeinated coffee, as well as their regular coffee.
I love strong, dark tasting coffee and these coffees are never bitter, but give you that New Orleans influenced flavor. They also have chicory coffee that is one of my favorites as well. They also have the following speciality coffees...
Double Vanilla
A decadent vanilla flavor and enticing aroma make this coffee the perfect treat.
Guatemalan Medium Roast
This single-source coffee gives a delightful, full-bodied cup with well-balanced acidity.
Hazelnut Creme
We add hazelnut and a touch of creamy vanilla to our signature Medium Roast for a taste that's truly indulgent.
New Orleans French Roast
This careful blend of Indonesian, African, and South American beans creates a flavor as complex as New Orleans itself.
Arabica Coffee with Pralines and Cream Flavor
In this premium coffee, you'll find notes of roasted pecans, caramelized sugar, and a touch of cream.
The Bartlett and Dodge families started French Market Coffee in 1890, in New Orleans’ bustling French Market. To this day they continue to roast the choicest Arabica beans and specially grind them to create the quintessential New Orleans coffee. It is also served in the city’s finest restaurants, many of which have been serving French Market Coffee for over 100 years.
Click HERE and find out how you can try their amazing coffees in your home, you'll be glad you did. This is an unpaid testimonial because I love their products, and I know you will too.
Be sure to see their products and like them on Facebook.
Tuesday, November 13, 2012
Cornbread Cooking Class
Here is my tried and true, tested recipe for some of the best cornbread ever. My late sister-in-law Sharlene made some of the best cornbread I had eaten. I really miss her and her love for great food. I worked on this recipe until I got it right. You do not have to use yellow cornmeal, I just like the color, although the one in the picture is white cornmeal.
I am gonna post the recipe for my Sausage Cornbread next. You think the cornbread is good, awww baby, the sausage cornbread will bring your tongue to it's knees. I use a cast iron skillet and recommend you do as well to get that good crispy texture on the bottom.
2 cups yellow cornmeal (I like martha White)
1 tsp Tony Chachere's Cajun Seasoning
½ tsp baking powder
2 eggs
1 ½ cups buttermilk
2 tbs oil (I like corn oil)
2 tbs bacon grease
Put bacon grease in a cast iron skillet, and place in a preheated 425º oven for 10 mins. Mix first 3 dry ingredients thoroughly in a bowl with a whisk. Mix next 3 wet ingredients in another bowl or big measuring cup. Combine wet and dry using whisk.
Remove skillet from oven. Pour batter mix into melted, hot bacon grease and give the skillet a little shake to settle the mix. Bake for 15 mins. or so until top of the cornbread browns a little and you cap tap the top and feel it is solid. Enjoy!
I am gonna post the recipe for my Sausage Cornbread next. You think the cornbread is good, awww baby, the sausage cornbread will bring your tongue to it's knees. I use a cast iron skillet and recommend you do as well to get that good crispy texture on the bottom.
2 cups yellow cornmeal (I like martha White)
1 tsp Tony Chachere's Cajun Seasoning
½ tsp baking powder
2 eggs
1 ½ cups buttermilk
2 tbs oil (I like corn oil)
2 tbs bacon grease
Put bacon grease in a cast iron skillet, and place in a preheated 425º oven for 10 mins. Mix first 3 dry ingredients thoroughly in a bowl with a whisk. Mix next 3 wet ingredients in another bowl or big measuring cup. Combine wet and dry using whisk.
Remove skillet from oven. Pour batter mix into melted, hot bacon grease and give the skillet a little shake to settle the mix. Bake for 15 mins. or so until top of the cornbread browns a little and you cap tap the top and feel it is solid. Enjoy!
Thursday, October 25, 2012
Let's Fry Some Chicken
Frying Chicken always looked so simple when Mama made some or one of my Aunts or Grandmothers, but actually doing it seemed perplexing. I love all kinds of Fried Chicken, I always assumed I would love deep-fried chicken best, but then I would think about the flavorful, tender fried chicken Mama made in her electric skillet. After reading lots of ways online, I decided to do my own deal. So here is my Fried Chicken recipe, and remember you don't have to use cast iron, but it sure helps.
Cousin Timmy’s Fried Chicken
1 cut up chicken (or 8 of your favorite pieces)
2 cups flour (self-rising or plain)
2 tbsp Cajun seasoning
1 tsp sea salt
1 tsp black pepper
1 tsp garlic powder
1 tsp paprika (I prefer smoked paprika)
vegetable oil or shortening for frying
*brine is 4 cups water and ¼ cup of sea salt
Rinse chicken off under faucet, place in one-gallon plastic zip-lock bag, add 4 cups water and the ¼ cup salt for brining. Seal and “smoosh” around to distribute chicken and salt. Place in fridge for several hours, (I like to leave mine overnight).
Remove chicken and rinse off under tap again, dry chicken off with paper towels. Combine the flour and all ingredients in a bowl. Dredge each piece of chicken in flour mixture and lay on a paper plate. In a large cast iron skillet or Dutch Oven, pour enough oil to fill about ½ inch of the skillet, turn on MED HI. When oil is hot, roll the first piece of chicken in the flour mixture again and shake off excess flour. Add to oil, repeat process until skillet is full. Turn oil down slightly and turn chicken pieces until all pieces are brown all over.
Make sure all the chicken is done, pierce the breast pieces and make sure all the juices run clear. Big pieces will take longer that the wings and legs. Place the smaller pieces in a pan covered in foil in an oven at 275°. When all pieces are done place them in the 275° oven with the rest for about 30 minutes. This will tenderize the chicken and insure doneness. You will love this chicken.
Enjoy friends!
Cousin Timmy’s Fried Chicken
1 cut up chicken (or 8 of your favorite pieces)
2 cups flour (self-rising or plain)
2 tbsp Cajun seasoning
1 tsp sea salt
1 tsp black pepper
1 tsp garlic powder
1 tsp paprika (I prefer smoked paprika)
vegetable oil or shortening for frying
*brine is 4 cups water and ¼ cup of sea salt
Rinse chicken off under faucet, place in one-gallon plastic zip-lock bag, add 4 cups water and the ¼ cup salt for brining. Seal and “smoosh” around to distribute chicken and salt. Place in fridge for several hours, (I like to leave mine overnight).
Remove chicken and rinse off under tap again, dry chicken off with paper towels. Combine the flour and all ingredients in a bowl. Dredge each piece of chicken in flour mixture and lay on a paper plate. In a large cast iron skillet or Dutch Oven, pour enough oil to fill about ½ inch of the skillet, turn on MED HI. When oil is hot, roll the first piece of chicken in the flour mixture again and shake off excess flour. Add to oil, repeat process until skillet is full. Turn oil down slightly and turn chicken pieces until all pieces are brown all over.
Make sure all the chicken is done, pierce the breast pieces and make sure all the juices run clear. Big pieces will take longer that the wings and legs. Place the smaller pieces in a pan covered in foil in an oven at 275°. When all pieces are done place them in the 275° oven with the rest for about 30 minutes. This will tenderize the chicken and insure doneness. You will love this chicken.
Enjoy friends!
Friday, October 19, 2012
Turkey Craw Beans
I had never heard of Turkey Craw Beans until my old pal Fiddle Dave Pierce fixed me a bunch. These are, to me, like a cross between a half runner and a shelly bean. Nice pods with huge beans in them. They are sort-of bulbous looking but oh so tasty.
I cooked these up like Mama used to cook them, a little bacon grease and cook'em down to the bottom of the pot. What do I mean? When cooking them, mama used to cook them in water, nearly covering them and then would cook the water out of them. You get a rich flavorful tasty bean that is perfect with a piece of cornbread and a few tomato slices. If you are the type that likes veggies crispy, don't use this method to cook your Turkey Craw or any other string bean. I have also used this method on Half-Runners and Greasy Back beans.
These are quite easy to make, I don't really need to give you a recipe per se, but here is a description on how to properly cook the wonderful beans.Start with enough beans to fill your 5 qt. cooker, (2 - 3 pounds) You will need to string these beans, you can also snap them but I like leaving them whole. In the bottom of your cooker add a couple of tbs of bacon grease, or cooking oil, and bring pot up to MED/HI. I add a tsp of Tony Chachere's and a tsp of Black Pepper. I also like to add ½ tsp garlic powder or 1 tbs dried garlic chips.
Add your beans, you can fill it all way up to the brim, as they will cook down. Now add just enough water to where it comes up just under your beans. Now, bring the beans up to a boil for about 15 - 20 mins. Turn down the heat and cook your beans to cook clowly turning them every once in a while. Cover and cook on low for a bit until tender. Now remove the lid and cook them until all the liquid has cooked off. Oh man are these good. Don't salt them too much as cooking the liquid off concentrates all flavors and the might be too salty.
Our next post will teach you to make the best cornbread ever!
I cooked these up like Mama used to cook them, a little bacon grease and cook'em down to the bottom of the pot. What do I mean? When cooking them, mama used to cook them in water, nearly covering them and then would cook the water out of them. You get a rich flavorful tasty bean that is perfect with a piece of cornbread and a few tomato slices. If you are the type that likes veggies crispy, don't use this method to cook your Turkey Craw or any other string bean. I have also used this method on Half-Runners and Greasy Back beans.
These are quite easy to make, I don't really need to give you a recipe per se, but here is a description on how to properly cook the wonderful beans.Start with enough beans to fill your 5 qt. cooker, (2 - 3 pounds) You will need to string these beans, you can also snap them but I like leaving them whole. In the bottom of your cooker add a couple of tbs of bacon grease, or cooking oil, and bring pot up to MED/HI. I add a tsp of Tony Chachere's and a tsp of Black Pepper. I also like to add ½ tsp garlic powder or 1 tbs dried garlic chips.
Add your beans, you can fill it all way up to the brim, as they will cook down. Now add just enough water to where it comes up just under your beans. Now, bring the beans up to a boil for about 15 - 20 mins. Turn down the heat and cook your beans to cook clowly turning them every once in a while. Cover and cook on low for a bit until tender. Now remove the lid and cook them until all the liquid has cooked off. Oh man are these good. Don't salt them too much as cooking the liquid off concentrates all flavors and the might be too salty.
Our next post will teach you to make the best cornbread ever!
Sunday, July 29, 2012
Terrible Pie Tragedy
A horrible tragedy has befallen a wonderful old New Orleans landmark. In operation since 1922 the Hubig's Pies Factory was totally destroyed early Friday morning in a 5 alarm fire. The family left the following message on their website...
On behalf of the Hubig's Pies family we would like to thank everyone for all of the love and support we have received throughout the years and during this difficult time. The abundant amount of thoughts, prayers, and strength that is being sent our way during this time is much appreciated. We are blessed to be part of such a resilient community and we send our immense gratitude to all of the first responders who "put this out with their tears." We will continue to update you on our progress. "REBUILD RESTORE REHUBIG'S, WE WILL NOT LOSE OUR FLAVOR!"
With Love, The Bowman and Ramsey Families.
It is unbelievable the amount of love that has been coming our way. We are truly blessed to have such loyal customers. Per all of your requests, we have contacted our t-shirt supplier and Hubig's Pies shirts are being made as we speak. You can place orders now and we will get them sent to all of you as soon as we possibly can. Again, we thank you for all of your heart warming thoughts and kind words.
We wish the families and all their employees well, and hope they're soon back up and running. My very first visit to New Orleans I was given one of these wonderful little pies and have been hooked since. My favorite is coconut. They wont be down for long! Stay tuned for more info on Hubig's New Orleans Style Pies!
RouxBDoo
On behalf of the Hubig's Pies family we would like to thank everyone for all of the love and support we have received throughout the years and during this difficult time. The abundant amount of thoughts, prayers, and strength that is being sent our way during this time is much appreciated. We are blessed to be part of such a resilient community and we send our immense gratitude to all of the first responders who "put this out with their tears." We will continue to update you on our progress. "REBUILD RESTORE REHUBIG'S, WE WILL NOT LOSE OUR FLAVOR!"
With Love, The Bowman and Ramsey Families.
It is unbelievable the amount of love that has been coming our way. We are truly blessed to have such loyal customers. Per all of your requests, we have contacted our t-shirt supplier and Hubig's Pies shirts are being made as we speak. You can place orders now and we will get them sent to all of you as soon as we possibly can. Again, we thank you for all of your heart warming thoughts and kind words.
We wish the families and all their employees well, and hope they're soon back up and running. My very first visit to New Orleans I was given one of these wonderful little pies and have been hooked since. My favorite is coconut. They wont be down for long! Stay tuned for more info on Hubig's New Orleans Style Pies!
RouxBDoo
Thursday, July 26, 2012
Low Country Shrimp & Grits
I realize some of the posts recently have not been about Cajun and Creole foods. The reason being I have changed jobs and am no longer working out of New Orleans. Now don't worry, I am still maintaining the Cajun and Creole name and all that goes with it, but I am expanding the menu a bit to include more Low Country, Appalachian and Smoky Mountain recipes as well.
I recently spent some time in Charleston and had some wonderful meals, so you can look forward to posts about some great restaurants we encountered there. I thought I would start the series off with my foray into Low Country cuisine by posting my own Shrimp and Grits recipe for you folks. I made it for some friends recently and it was a huge success. Here you go!
Low Country Shrimp & Grits
Grits
2 cups Quick Grits
3 cups water
3 cups milk
1/4 stick butter
1 cup grated colby/jack cheese
1/2 cup andouille smoked sausage (grated)
1 tbs Cajun Seasoning (Tony Chachere's)
1/2 tsp each of garlic powder, salt, and black pepper
Shrimp
1 - 2 lbs of Medium Shrimp (1 lb for every 3 people)
1/4 stick butter
1 tbs oil
1 tbs Cajun Seasoning (Tony Chachere's)
1 tsp minced garlic
1/4 cup green onions, sliced thin
Roux Sauce
1/4 stick butter
1 tsp worcestershire sauce
1/2 cup diced fresh tomatoes (or diced, canned tomatoes, drained well)
1 tbs flour
1/2 cup heavy cream
1 tbs minced parsley
Prepare the girts by combining the milk, water, butter, andouille, and spices in a pot and bringing it to a boil on MED HI. Whisk in your grits gradually to avoid lumps. Stir in all the grits and turn the pot down to MED and stir from time to time. When grits have thickened up stir in the cheese gradually to avoid clumps. Turn down to LO and check for seasoning.
In a hot skillet on MED HI, add oil and melt butter. Toss the Cajun Spice on the shrimp and let set a minute. Add the garlic into the pan and let it brown slightly, then add your shrimp in enough to cover the bottom of the skillet. These will not take long to cook, but I like a little brown crusties around the edges. Add the green onions and stir well to give them a little heat as well.
After removing the shrimp, toss in you remaining butter and let it melt. This skillet should have a little "graton" browning in the bottom, using a wooden spoon scrape the pan to combine the little dregs with the butter. Add the flour and stir constantly until it is a nutty brown. Add the worcestershire and stir well. Now toss in the tomatoes and stir for about a minute until the tomatoes wilt. Add the heavy cream and stir well to combine. This is not a low-fat dish.
Spoon the grits in a nice portion onto a plate, arrange the shrimp onto the grits and spoon the sauce over the shrimp. Enjoy!
I had shrimp and grits in Charleston a couple of times, while they were great, I liked mine better. If you want to take the time to use regular stone ground grits instead of quick grits, you are welcome to, I use both but when in a hurry, it is easier with the instant..
I recently spent some time in Charleston and had some wonderful meals, so you can look forward to posts about some great restaurants we encountered there. I thought I would start the series off with my foray into Low Country cuisine by posting my own Shrimp and Grits recipe for you folks. I made it for some friends recently and it was a huge success. Here you go!
Low Country Shrimp & Grits
Grits
2 cups Quick Grits
3 cups water
3 cups milk
1/4 stick butter
1 cup grated colby/jack cheese
1/2 cup andouille smoked sausage (grated)
1 tbs Cajun Seasoning (Tony Chachere's)
1/2 tsp each of garlic powder, salt, and black pepper
Shrimp
1 - 2 lbs of Medium Shrimp (1 lb for every 3 people)
1/4 stick butter
1 tbs oil
1 tbs Cajun Seasoning (Tony Chachere's)
1 tsp minced garlic
1/4 cup green onions, sliced thin
Roux Sauce
1/4 stick butter
1 tsp worcestershire sauce
1/2 cup diced fresh tomatoes (or diced, canned tomatoes, drained well)
1 tbs flour
1/2 cup heavy cream
1 tbs minced parsley
Prepare the girts by combining the milk, water, butter, andouille, and spices in a pot and bringing it to a boil on MED HI. Whisk in your grits gradually to avoid lumps. Stir in all the grits and turn the pot down to MED and stir from time to time. When grits have thickened up stir in the cheese gradually to avoid clumps. Turn down to LO and check for seasoning.
In a hot skillet on MED HI, add oil and melt butter. Toss the Cajun Spice on the shrimp and let set a minute. Add the garlic into the pan and let it brown slightly, then add your shrimp in enough to cover the bottom of the skillet. These will not take long to cook, but I like a little brown crusties around the edges. Add the green onions and stir well to give them a little heat as well.
After removing the shrimp, toss in you remaining butter and let it melt. This skillet should have a little "graton" browning in the bottom, using a wooden spoon scrape the pan to combine the little dregs with the butter. Add the flour and stir constantly until it is a nutty brown. Add the worcestershire and stir well. Now toss in the tomatoes and stir for about a minute until the tomatoes wilt. Add the heavy cream and stir well to combine. This is not a low-fat dish.
Spoon the grits in a nice portion onto a plate, arrange the shrimp onto the grits and spoon the sauce over the shrimp. Enjoy!
I had shrimp and grits in Charleston a couple of times, while they were great, I liked mine better. If you want to take the time to use regular stone ground grits instead of quick grits, you are welcome to, I use both but when in a hurry, it is easier with the instant..
Sunday, June 24, 2012
Growing Tomatoes all up in Here!
Well, I have threatened to plant tomatoes for a while now and I finally did it. On a small scale to see how I do. I have 3, yes 3 tomato plants in plastic buckets and can't wait for them to spring up. I love tomatoes, but hate the old plastic tasting ones you get through the winter. I would rather go without than eat one of those. My favorite salad is tomatoes, cucumber, onion, and celery. All diced up and sprinkled with apple cider vinegar, black pepper, salt and dill weed. Awwww man!I have planted 3 different types...
1. Mister Stripey, a yellow tomato with red streaks.
2. An heirloom called Rutgers
3. Another heirloom called German Queen
I wanted Cherokee Black tomatoes but couldn't find the plants, gonna keep looking though, they are my favorite. OK gotta go water them. Stay tuned and I will give you tomato updates.
Timmy
Thursday, May 10, 2012
Jessica Potts - Culinary Arts Student
Hello my blog friends, I want you to meet a wonderful young lady. She is my neighbor Jessica Potts, she not only shares my love of cooking and food but she has decided to make it her life's work. As part of her educational requirements and my own desire for you to meet her, I am presenting her essay on why she has decided to attend Walters State Community College in Sevierville, Tennessee. I hope you enjoy her youthful exuberance and excitement for her chosen field.
Upon seeing Walters State Community College, its beautiful campus nestled in a valley of the Great Smoky Mountains, it immediately captured my interest. Although this is a satellite campus, it's perfect for the student that desires the individualized attention that the faculty provides. While viewing the facilities, I noticed the amount of community involvement. Upon entering the culinary arts facilities I was astounded at the state-of-the-art learning environment as well as the supplies provided to the students. After reviewing the quality amenities and more, it was not difficult for me to make my decision quickly.
Since Walters State is a small school it allows the students to develop a personal relationship with their professors. I know that my professors don't just view me as a grade, they are genuinely concerned about my success and education. One personal example was a professor who helped me find a job knowing I needed one. All my professors have real world experience and can easily apply their knowledge to the lessons while captivating the class’ attention. The faculty is more than eager to offer help outside of class time and are always available to answer questions and encourage students to excel in their field of study.
Being that Walters State is located in Sevier County, which is a small community, it is very important to be active in charitable causes. While attending Walters State I have participated in a variety of community service projects which include: Sevier County Food Ministries, Pro- Start Culinary Competition, and Refuge Prayer Gathering. I am grateful that Walters State provided these opportunities for me to give back to my community by donating my time and skills to improve other’s lives.
The facilities permit a lucrative learning environment due to access to proper equipment and plentiful supplies. This makes learning cooking methods much easier and less stressful due to the students always having proper functioning, professional equipment. The students also have the prospect of learning a variety of cooking techniques due to the impressive assortment of tools at their disposal.
There are many reasons why I chose to attend Walters State. From the first day on I couldn't be happier with my choice to further my education at this school. There was no hesitation to apply after I toured the college and saw the boundless opportunities it offers its students. After enrolling in the culinary arts program, my interest has grown measurably due to my wonderful experience and pleasant learning environment.
Signed
Jessica Potts
This scholarship is sponsored by CenturyLinkQuote.com.
Upon seeing Walters State Community College, its beautiful campus nestled in a valley of the Great Smoky Mountains, it immediately captured my interest. Although this is a satellite campus, it's perfect for the student that desires the individualized attention that the faculty provides. While viewing the facilities, I noticed the amount of community involvement. Upon entering the culinary arts facilities I was astounded at the state-of-the-art learning environment as well as the supplies provided to the students. After reviewing the quality amenities and more, it was not difficult for me to make my decision quickly.
Since Walters State is a small school it allows the students to develop a personal relationship with their professors. I know that my professors don't just view me as a grade, they are genuinely concerned about my success and education. One personal example was a professor who helped me find a job knowing I needed one. All my professors have real world experience and can easily apply their knowledge to the lessons while captivating the class’ attention. The faculty is more than eager to offer help outside of class time and are always available to answer questions and encourage students to excel in their field of study.
Being that Walters State is located in Sevier County, which is a small community, it is very important to be active in charitable causes. While attending Walters State I have participated in a variety of community service projects which include: Sevier County Food Ministries, Pro- Start Culinary Competition, and Refuge Prayer Gathering. I am grateful that Walters State provided these opportunities for me to give back to my community by donating my time and skills to improve other’s lives.
The facilities permit a lucrative learning environment due to access to proper equipment and plentiful supplies. This makes learning cooking methods much easier and less stressful due to the students always having proper functioning, professional equipment. The students also have the prospect of learning a variety of cooking techniques due to the impressive assortment of tools at their disposal.
There are many reasons why I chose to attend Walters State. From the first day on I couldn't be happier with my choice to further my education at this school. There was no hesitation to apply after I toured the college and saw the boundless opportunities it offers its students. After enrolling in the culinary arts program, my interest has grown measurably due to my wonderful experience and pleasant learning environment.
Signed
Jessica Potts
This scholarship is sponsored by CenturyLinkQuote.com.
Monday, January 9, 2012
Farmland Foods Smoked Spiral Ham Slices and Pieces
I found this product at my WalMart here in Sevierville and have fallen in love with it. Now you all should know, I love the crispy, sometimes crunchy parts of meats. For example, I love the end-cut of prime rib, I love the crispy skin on the turkey, and the crunchy bits left around the bone in a ham, smoked or fresh. I also love the taste of smoked, cured ham and using it for seasoning dishes such as beans, soups, or whatever. I have an economical answer to all these.Farmland Foods Smoked Spiral Ham Slices and Pieces is a package of scraps, chunks, and I'd say about 60 - 65% of it are nice slices for sandwiches. Oh those big chunks are amazing. I had seen this kind of packaging of ham scraps in New Orleans with other companies, but we don't get those up here in Tennessee. This ham is wonderful tasting, right amount of smokiness, and great for seasoning nearly anything or just nibbling on. Tonight I am using some in my Jambalaya along with andouille sausage, and chicken. Check out the Farmland Foods website above, or if you are at WalMart, ask about these taste tidbits and morsels by Farmland. If you go to their website they have a store locator, if you contact Farmland, tell them RouxBDoo sent you!
RouxBDoo
Saturday, January 7, 2012
Curried Lentil and Barley Soup
It is wintertime and I love to make and eat soup at this time of year. Now, there are other soups besides gumbo, shrimp stew, and crab bisque, believe it or not. This soup has an Indian flair to it with the inclusion of the cilantro and curry powder, similar to a Dal. Lentil and barley can have a positive effect on your health as they are great sources of fiber. Your vegetarian friends will love it, without the bouillon cube of course. I dedicate this to my Indian "family" members Mangesh Desai and his beautiful sister Prachi Desai. I have mentioned Mangesh before but his gorgeous sister, whom I've never met, has become a wonderful long distance friend. The are originally from Mumbai, but Prachi now lives in London. Mangesh is a successful variety television producer in Mumbai. He calls me his "American Dad".
Curried Lentil and Barley Soup
1 cup lentils
¾ cup barley (Quaker Oats Medium)
½ large onion (diced)
2 ribs of celery (diced)
5 cloves garlic (minced)
1 8 oz. can Rotel (diced tomatoes and peppers)
2 tbs Curry powder
1 Chicken bouillon cube (opt.)
1 tsp turmeric
1 tsp whole cloves
1 tsp cinnamon
½ tsp cayenne pepper
1 tsp black pepper
½ tbs salt
1 tsp garlic powder
2 tbs fresh cilantro
2 tbs green onions (sliced thin)
3 tbs oil (any type)
10 - 12 cups water
In one pot on MED/HI, boil 4 cups of water, once boiling add the barley and stir to make sure it doesn't stick to the bottom.
In another pot on MED/HI heat the oil. Saute the onions, garlic, and celery until wilted. Add all spices, herbs and stir well. Rinse the lentils in water a couple of times and then add to the pot. Stir until the lentils are incorporated into the mix, then add 4 cups of water. Bring to a boil for about 10 mins.
Dissolve the bouillon cube in 2 cups of boiling water.
Once the barley has nearly absorbed the water add it into the lentil mix. Add the can of Rotel tomatoes, the bouillon, and check the seasonings and consistency of the soup, add a cup of water if you'd like. Bring all to a boil for 10 mins. and turn down to MED/LO. Simmer about and hour or until lentils and barley are soft and tender.
This, like gumbo is much thicker and tastier the next day.
Enjoy!
RouxBDoo
Saturday, December 31, 2011
Happy New Year 2012
Well it's been a fast paced wonderful year. I have a new job (CLICK HERE) and many new opportunities in the new city I am living. I am no longer traveling to New Orleans on a regular basis but I am still cooking and seeking out new sources of good Cajun and Creole cooking. I have some upcoming posts about products I am trying out as well.Dear friends, have a wonderful New YEar and I hope all are prosperous in 2012. Have fun but don't drink and drive tonight.
RouxBDoo
Thursday, December 22, 2011
Buttermilk Pie for the Holidays
I love Pecan Pie for the Holidays but a lot of people seem more and more to have nut alergies, I thought I'd publish this recipe which is a favorite of mine, similar to Pecan Pie in flavor but no pecans.
2 cups sugar
1 stick butter, room temperature
4 tbs flour
3 whole eggs, slightly beaten
1 cup buttermilk
1 ½ tbs vanilla
1 whole 9-inch pie shell, unbaked
In large bowl cream together sugar, butter and flour. Add eggs, buttermilk and vanilla. Pour into unbaked pie shell and bake for 1 hour at 325 degrees or until knife inserted in center comes out clean. Cool and serve.
Merry Christmas!
2 cups sugar
1 stick butter, room temperature
4 tbs flour
3 whole eggs, slightly beaten
1 cup buttermilk
1 ½ tbs vanilla
1 whole 9-inch pie shell, unbaked
In large bowl cream together sugar, butter and flour. Add eggs, buttermilk and vanilla. Pour into unbaked pie shell and bake for 1 hour at 325 degrees or until knife inserted in center comes out clean. Cool and serve.
Merry Christmas!
Turkey and Dressing Soup with Dumplins
This is my recipe for, I think, the best after-holiday turkey leftover soup. I don't usually measure out the turkey meat, I usually use most of the remaining breast meat. Around 3 lbs I would think. I use a lot because this recipe makes a lot of soup.
3 lbs turkey breast meat (roasted, shredded coarse in big chunks)
½ stick butter or margarine
1 large onion (diced)
4 ribs of celery (diced)
½ tsp garlic (minced)
8 cups water
4 cups milk
4 cups turkey or chicken stock (if using stock from your turkey be sure to skim the fat off)
1 can cream of chicken soup
1 6 oz. box dressing mix (cornbread variety)
1 tsp cajun/creole spice mix
1 tbs kosher salt
½ tbs black pepper
2 sprigs thyme
½ tsp dried sage
2 bay leaves
In a large pot on MED/HI ( I use a 7 qt. dutch oven ) melt the butter and sauté the onion and celery until softened. Add garlic, spice mix, salt, pepper, thyme, sage, and bay leaves. Let this go for about 5 minutes. Stir in the stock, after 5 minutes add the turkey. Let this cook for about 10 minutes then add the water and milk. Bring this to a boil and pour in the dressing mix and the cream of chicken soup. Bring back up to a boil for about 10 minutes, turn down to MED/LO and let cook for an hour to tenderize the turkey. Check the celery in the soup to see if it is soft before adding the dumplins with the recipe below. By the way, this soup is great by itself, but the dumplins really top it off.
Dumplin' mix
1 cup flour (self rising or use plain and add 2 tbs baking powder)
2 tbs oil (i don't recommend olive oil, use a flavorless vegetable or safflower oil)
1 pinch salt & pepper
milk or water
In a bowl combine the flour, salt and pepper, oil, and enough milk or water to make a mix about the consistency of cooked oatmeal. Turn soup down to MED/LO and drop half-spoonfuls into soup. The dumplins will puff up and float to the top of the soup.
Enjoy the food of the Holidays
3 lbs turkey breast meat (roasted, shredded coarse in big chunks)
½ stick butter or margarine
1 large onion (diced)
4 ribs of celery (diced)
½ tsp garlic (minced)
8 cups water
4 cups milk
4 cups turkey or chicken stock (if using stock from your turkey be sure to skim the fat off)
1 can cream of chicken soup
1 6 oz. box dressing mix (cornbread variety)
1 tsp cajun/creole spice mix
1 tbs kosher salt
½ tbs black pepper
2 sprigs thyme
½ tsp dried sage
2 bay leaves
In a large pot on MED/HI ( I use a 7 qt. dutch oven ) melt the butter and sauté the onion and celery until softened. Add garlic, spice mix, salt, pepper, thyme, sage, and bay leaves. Let this go for about 5 minutes. Stir in the stock, after 5 minutes add the turkey. Let this cook for about 10 minutes then add the water and milk. Bring this to a boil and pour in the dressing mix and the cream of chicken soup. Bring back up to a boil for about 10 minutes, turn down to MED/LO and let cook for an hour to tenderize the turkey. Check the celery in the soup to see if it is soft before adding the dumplins with the recipe below. By the way, this soup is great by itself, but the dumplins really top it off.
Dumplin' mix
1 cup flour (self rising or use plain and add 2 tbs baking powder)
2 tbs oil (i don't recommend olive oil, use a flavorless vegetable or safflower oil)
1 pinch salt & pepper
milk or water
In a bowl combine the flour, salt and pepper, oil, and enough milk or water to make a mix about the consistency of cooked oatmeal. Turn soup down to MED/LO and drop half-spoonfuls into soup. The dumplins will puff up and float to the top of the soup.
Enjoy the food of the Holidays
Great Side Dish for Christmas
Alright friends this isn't Cajun or Creole, but I love it and you can serve it with your Christmas Dinner along with your turkey or ham. You can even use it with your leftover turkey afterwards. I is savory and creamy, if you are having it with turkey you can omit the meat from it. Here is my simple Chicken with Rice Casserole.
1 cup shredded cooked chicken (or turkey) breast
1 ½ cup water
1 ½ cup rice (uncooked)
2 10 oz. cans Cream of Chicken Soup
¼ cup diced onions
¼ cup diced celery
¼ cup diced fresh mushrooms
2 tbs diced green onions
½ stick butter or margarine
½ tsp black pepper
1 tsp Tony Cachere's
1 tsp dried sage flakes
1 tsp parsley flakes
1 tsp dried garlic flakes
¼ tsp cayenne pepper
In an oven-proof pot with a lid, melt butter and saute the onions, mushrooms, celery, and green onions on MED/HI until onions soften. Add all spices and shredded chicken. stir and saute all together. Add the water and bring to a boil for 5 mins., add the rice and stir well to distribute to keep from lumping.
Cook for 5 mins. and then add the cans of soup. Slide off the stove eye and stir extremely well, making sure the soup and rice are thoroughly mixed. Cover with the lid and place in a pre-heated 300º oven for 1 hour. Let cool slightly before serving.
Stay tuned for my Great Turkey Leftover Soup!
RouxBDoo
1 cup shredded cooked chicken (or turkey) breast
1 ½ cup water
1 ½ cup rice (uncooked)
2 10 oz. cans Cream of Chicken Soup
¼ cup diced onions
¼ cup diced celery
¼ cup diced fresh mushrooms
2 tbs diced green onions
½ stick butter or margarine
½ tsp black pepper
1 tsp Tony Cachere's
1 tsp dried sage flakes
1 tsp parsley flakes
1 tsp dried garlic flakes
¼ tsp cayenne pepper
In an oven-proof pot with a lid, melt butter and saute the onions, mushrooms, celery, and green onions on MED/HI until onions soften. Add all spices and shredded chicken. stir and saute all together. Add the water and bring to a boil for 5 mins., add the rice and stir well to distribute to keep from lumping.
Cook for 5 mins. and then add the cans of soup. Slide off the stove eye and stir extremely well, making sure the soup and rice are thoroughly mixed. Cover with the lid and place in a pre-heated 300º oven for 1 hour. Let cool slightly before serving.
Stay tuned for my Great Turkey Leftover Soup!
RouxBDoo
Thursday, December 1, 2011
Merry Christmas Friends!
It's beginning to look a lot like Christmas, today is the 1st of December and I assume most of you are preparing for Christmas, or the holidays in general. We here at RouxBDoo's are going to try and ramp up our frequency on publishing posts and featuring restaurants and products.I am no longer working out of New Orleans and it is more difficult to feature NOLA restaurants. We will be featuring other places that serve Cajun and Creole food around this area. I am also expanding the scope to include more Low Country and Appalachian Mountain foods. I grew up here in the mountains of East Tennessee and Southwest Virginia and the food is much simpler than some of the others in this blog but no less wonderful.
If you click on the above banner, right under the RouxBDoo graphic, you can download some of the Harkleroad family Christmas favorites. My Dad's Peanut Butter candy, my Scottish Shortbread, and my wife's Sugar cookies and Icing recipes are listed there, I think you'll like them. I am also going to be featuring more holiday recipes this season, so strike the harp and join the chorus, Fa-la-la-la-la-la-la-la-la!
RouxBDoo
Saturday, October 29, 2011
Pickled Green Tomatoes
This time of year everyone's gardens are about gone and I had friends give me some of their tomatoes that didn't make it in time. Many were green or barely starting to ripen. I used this recipe to make some wonderful Pickled Green Tomatoes that didn't require all the typical canning processes. These should keep for several weeks or even a month or two. The ones I made didn't last long enough to go bad! Everyone loved them. They are tart but tasty. PICKLED GREEN TOMATOES
1 qt. jar of small green tomatoes, cut into eights
8 sections of garlic sliced in half
1 cup white vinegar
1 cup apple cider vinegar
½ cup water
2 tbs kosher salt
1 tbs sugar
1 tbs pickling spices
1 tsp mustard seeds
½ tsp celery seed
½ tsp dill seed
½ tsp garlic powder
½ tsp pepper flakes
Place tomatoes tightly in a quart jar, arrange slivers of garlic throughout the tomato wedges. Combine the remaining ingredients and bring to a boil, cook for 5 more minutes. Pour over the tomatoes in jar filling ¼ inch from top. Tighten lids and wipe off edges, and leave out on the counter for about 1 hour. Listen for the popping sound to make sure they seal. Place into refrigerator for 2 weeks before using to give the pickles time to develop flavor.
Make these wonderful pickles.
RouxBDoo
Tuesday, October 25, 2011
Savannah's Moon River Brewing Company
In 2003, the American Institute of Paranormal Psychology named Savannah the most haunted city in America. And what's widely regarded as the most haunted place in Savannah? The Moon River Brewing Company.While in Savannah with my family, we went to Moon River for lunch and had a wonderful time. The burgers, most of us ordered burgers, were amazing. Everything we had there was wonderful, and I thought Halloween would be a good time to post about it.
Located on the historic Bay St. the only problem we had was parking, you're best to walk from your hotel if it's nearby, there's also a parking garage a few blocks away. Of course being haunted had peaked my interest to start with and was instrumental in our dining arrangements.
After lunch we made our way down to the cellar, which is the reported center of the haunting. Seems they have a ghost named Toby in the cellar and a lady ghost up on the third floor that has been seen by many. After roaming around and taking pictures, as well as recording some sound clips we determined the ghosts had taken the day off.
This doesn't mean it isn't haunted, it has been visited by suck paranormal television shows as Ghost Hunters, and the wacky boys of Ghost Adventures. As a matter of fact both caught valuable evidence in their investigations.
We had a wonderful day, a great meal, and top notch vacation in the historic city of Savannah Georgia. For more information you can find the Moon RIver Brewing Company at 21 W. Bay St., or call them at 912-447-0943. You can find them online at Moon RIver Brewing Company Pictured is the Savannah Georgia Customs House, which is on the other side of Bay Street from the Brewery.
Halloween Party Appetizers
Well, it's my favorite time of the year and many of you are having Halloween Parties and I thought I would give you some great little party recipes to use. These are easy but you can use your artistic side to dress them up as something nasty.These recipes were published in my first book on building haunted attraction called "The Complete Haunted House Book". These were all recipes we used for years in our Halloween parties my wife and I used to put on. We would spend a week or more decorating the house to make it look spooky and haunted, and people would spend the whole party in the kitchen. You will find these are not only tasty but some look creepy and disgusting. The first one is one of my favorites.
Maggot Infested, Death Eatin' a Cracker
On a serving plate, place two 8 oz. packages of cream cheese, cover this with a ½ pound of boiled baby shrimp, and top with a bottle of red cocktail sauce. This is nasty looking, but tastes great. Serve with any type of wheat or vegetable cracker. This is my niece Kim Turner’s recipe.
Socket Poppers
2 lb. pkg. frozen meatballs
12oz. can cream of mushroom soup
12oz. carton sour cream
1 tsp. dill weed
In a bowl, combine equal parts of sour cream, cream of mushroom soup with a dash of dill weed. Pour this over ready-cooked meatballs in a casserole dish. Place this in an oven to bake at 300˚. Serve with toothpicks. Slice olives crosswise and garnish to look like an iris.
Sleaze Dip with Torture-tillas
Melt a 1 lb. brick of Velveeta cheese and stir in a can of Ro-Tel, (spicy tomatoes and peppers) or a jar of hot salsa and keep warm in a crock-pot. Serve with tortilla chips. You can also add a can of bean-less chili to the melted cheese instead of Ro-Tel. Use a double boiler to avoid burning. A microwave can also be used, but watch it closely.
Dead Man's Fingers
frozen, jointed, chicken wings
bar-b-que sauce
garlic powder & black pepper
Dip frozen wings in Bar-B-Que sauce and put them on a rack in a 300˚ degree oven. A dash of garlic powder and black pepper top it off. You might need to baste these occasionally. Bake really well done and keep them warm in the oven. Serve with Bleu Cheese dressing. Buy a packet of toy rings in the party section of a discount store and slip them onto a few of the wings to enhance the finger effect.
Thursday, October 13, 2011
Zatarain's Jambalaya Mix
OK, I know I am gonna take some heat on this because most of you that really know me, and my somewhat snobbish ways, know that when it concerns food, and I should say authentic foods, that I am indeed... picky.I have always been a Cajun "brown" Jambalaya lover/maker and have had some pretty atrocious versions of "red" in and around New Orleans. It takes me a couple of hours prepping, cooking, and finishing off my Jambalaya, so I only fix it once every other month or so. It is awesome though.
A girl at work brought in something the other day, I asked "what is that"? She said "Jambalaya, it's not as good as yours though" which flattered me, so I tried some. It was very good, even considering she had used Italian sausage in it. Now notice I am not going out on too long a limb.
She told me it was Zatarain's. I was amazed since I have usually not placed much stock in boxed dinners, but I do know and love some of Zatarain's products. So I went to the store, got a pack of the "Reduced Sodium" Zatarain's Jambalaya Mix, and made some up. I sliced up half a pound of andouille (or smoked sausage), one plump, de-boned, shredded-up, chicken breast from the kitchen here at work, (dinner theater with fried chicken) a half-cup of diced onion and half-cup diced celery. So I had really very little invested in it.
In 1 tbs of margarine, I sweated the onions and celery in a 3 qt. saucepan, added the chicken meat, andouille, and let it go a bit, then added the 2 1/2 cups of water the box called for. I brought it to a boil, then added the mix. Easy peasy lemon squeezy.
I turned the heat down a bit and simmered for about 20 mins., stirring occaisionally. Put the lid on the pot and popped it into the 300º oven for 15 minutes. Brought it out, fluffed it a bit, and tasted it. You know what? It was really, really tasty.
You dont have to add the onions or celery, and you can add diced ham, shrimp, or whatever for your meat. If a snob like me can enjoy this easy set-up anyone can. I knocked it together in about 10 mins. it cooked for about 40 mins. all together, and was cheap. Do I like it better than my scratch-made version? No, but in a hurry, this is fine... try it out.
BTW The Reduced Sodium version has 40% Less Sodium than regular Zatarain's Jambalaya Mix with NO MSG Added!
OK lemme have it!
RouxBDoo
Wednesday, September 14, 2011
Rotisserie Chicken and Andouille Gumbo
I was at WallyWorld the other day, (WalMart to the rest of you) and saw one of those delicious rotisserie chickens that I love so. Warm, dark crispy skin, savory, succulent, ooooozing with tasty juices, all wrapped in a plastic container for me to take home. After sampling the tastiest of morsels, (the top of the delicious breast with the wonderful skin attached) I decided I'd like to use the rest for some wonderful, dark, rich gumbo. Here is the recipe.1 cup cooking oil
1 ½ cup plain flour
3 cup onion (diced)
2 cup celery (diced)
1 cup green bell pepper (diced)
2 cloves garlic (minced)
4 tbs worcestershire sauce
1 tbs tabasco sauce
2 bay leaves
2 sprigs fresh thyme (or ½ tsp dried)
½ tbs kosher salt
½ tbs black pepper
½ tsp cayenne pepper
2 cups crushed tomatoes
½ cup green onion (sliced thin)
¼ cup parsley (minced)
1 Rotisserie Chicken
1 lbs Andouille sausage (sliced ½ inch)
10 cups water
To start with, remove all the usable meat from the chicken chop up to a medium dice and set aside. Place all skin, bones, scraps, and any leftover stock or brown gelatinous yummy stuff that is in the chicken carton, into a stock pot, along with any onion or celery scraps. Cover with 10 cups of water and bring to a boil. You can add your herbs at this point to include their intense flavor into the stock. Cook for 45 mins. to an hour on MED/HI. Strain the stock into a pot and keep warm on the stove. Should yield about 8 cups.In a MED/HI cast iron Dutch Oven, make a dark brown roux from the oil and flour. When the roux is right, add the onions and cook, stirring for 10 minutes. Now add the celery, green pepper, garlic, ½ of the green onions, and cook for 10 minutes. Add all spices, tabasco, and worcestershire sauce.
Add 2 cups of the hot stock and stir well until it combines with the roux. Add the diced smoked sausage, chicken meat, and cook 10 mins. Now add remaining stock, tomatoes, and bring to a boil for 5 minutes.
Turn back down to MED/LO and cook 1 hour, stirring occasionally. Add remaining parsley and chopped green onions, and let it simmer another half hour on LO. Serve over rice.
* If you like okra in your gumbo, heat ¼ cup of oil and sauté 2 cups of frozen or fresh okra in another skillet until it is no longer sticky and gooey, about 20 minutes on MED. Add to gumbo when you add the sausage and chicken.
* 1 tbs. of Filé powder can also be added during the last 15 mins. of cooking.
Wednesday, July 13, 2011
I'm Pickle Silly!!!
The season's change to summer used to not matter much to me since I worked on a cruise ship in the Caribbean for so long, and it was pretty much summer all year round. Now I'm in the mountains again, surrounded by folks who have gardens. Soon I was overrun with yellow crook neck squash, (or yeller squarsh as they's call back home) and need to figure out different things to do with it. For some reason, I thought pickles.
Mama always made pickles every summer, as did all women when I was growing up. Now it doesn't seem to be much of a priority since you can buy them for a third of what it cost to can some, not to mention the time and effort. My mother would make a few of my favorites every summer, lime pickles, bread and butter pickles, and chow-chow. For those of you unfamiliar with chow-chow, it is a relish we hillbillies eat with our pinto beans.
I had copied some recipes from Alton Brown on Good Eats, one of my favorite hosts and shows. They were both what you would call "Quick Pickles" that do not require all the elaborate canning processes. Basically put the vegetable in the jar, pour the "brine" over it, and let it sit in the fridge for a couple of weeks. These will not keep on the shelf in your cupboard through the year. Here is a picture of what he calls "Fire Crackers" the recipe is down below. I am also including his easy Bread and Butter Pickles. The two recipes are similar in the brine. Both take two weeks to set.
Speaking of which, I have discovered a wonderful resource for recipes... it's something called the internet. Invented by Al Gore to provide folks with recipes for cooking nearly anything, and to see pictures of naked ladies. I found nearly a million yellow squash recipes, and nearly all of them were the same. OK a few variations here and there, but basically the same. I figured I could pretty much cobble up my own version from these files... recipe files, not naked lady ones.
The first one I made was a Yellow Squash Relish. I had no idea how this would taste but I thought I'd give it a try. Keep in mind, in addition to the squash I also got zucchini, cucumbers, green peppers, onions, etc. so I would have a vast array of ingredients to choose from. Of course the only problem remaining would be the spices. Now I keep, on-hand, a fairly decent collection of spices, but I did not have turmeric, mustard seeds, celery seeds, and so-on. This was where it ran into money, also I needed jars, lids, and caps. I got all my spices for under $20 and they will do me for a while, (my mother had a bottle of garlic powder for around 17 years, she cooked very plain). Below is the recipe.
Yellow Squash Relish
4 cups squash and/or zucchini (diced)
1 cup onion (diced)
½ cup red bell pepper
1 cup white vinegar
1 ½ cup white sugar
1 tsp celery seeds
1 tsp mustard seeds
1 tsp turmeric
½ tsp hot pepper flakes
¼ cup kosher salt
1 cup water
Cut the yellow squash and zucchini, in quarters, lengthwise. Remove the seeds and dice them extremely small. I dice up 2 cups of squash and 2 cups of the zucchini. Chop one onion into small dice, it should be a cup, as well as a red or green bell pepper, use about half a cup. Red looks better.
Place in a large bowl and sprinkle ¼ cup salt and add 1 cup water. Stir well and let stand 1 hour in the refrigerator. Drain well and rinse with cold water twice. Transfer this into a couple of jars. Bring vinegar, sugar, and all remaining ingredients in a pot and bring to a boil. Pour hot mixture over vegetables in the jars. Let cool then refrigerate, then use as needed. By the way, you can slice the squash and make these in a more traditional method.
Fire Cracker Carrots
1 cup water
1 cup sugar
1 ½ cider vinegar
1 tsp onion powder
½ tsp mustard seed
1 ½ tsp salt
1 tsp chili flakes
2 dry chilis
1 lb baby carrots
Combine all ingredients, except the carrots and dry chilis, in a saucepan, bring to a boil, and simmer for 10 mins. Place the dry chilis on top and pour the brine over the carrots already in the jar, seal and refrigerate for 2 weeks. I used split green serrano peppers instead of the dried red chilis.
Bread & Butter Pickles
1 cup water
1 cup vinegar
1 ½ cup sugar
1 tbs salt
½ tsp mustard seed
½ tsp turmeric
½ tsp celery seed
½ tsp pickling spice
2 med cucumbers
½ onion (sliced)
Slice the cucumbers and the onion into thin slices. Place in a jar. Combine all brine ingredients in a saucepan, bring to a boil, and simmer for 10 mins. Pour over the cucumbers and onions already in the jar, seal and refrigerate for 2 weeks.
Last year I did a post about a great restaurant in Charleston called Jestines. I fell in love with her Icebox Pickles, so I had to make those too! You can see by the picture they're fairly light and require only 48 hrs. to set. Here is the amazingly easy recipe.
Jestine's Icebox Pickles
6 small cucumbers
1 tsp sugar
1 tbs kosher salt
1 tsp dried dill
1 cup white or apple cider vinegar
½ cup water
1 tsp. red pepper flakes
Slice cucumbers and place in a clean, heat proof container. Add sugar, salt, herbs and pepper flakes. Heat vinegar and water to a low boil; pour over cucumbers. Refrigerate for 48 hours.
Try these recipes out and let me know how they go. I like these because they do not require all the canning equipment, weather forecasts, witchcraft, and almanacs just to turn out a pickle or two. I had fun making these and will have even more fun enjoying these and giving some away. Alright now, get to picklin'.
RouxBDoo
Mama always made pickles every summer, as did all women when I was growing up. Now it doesn't seem to be much of a priority since you can buy them for a third of what it cost to can some, not to mention the time and effort. My mother would make a few of my favorites every summer, lime pickles, bread and butter pickles, and chow-chow. For those of you unfamiliar with chow-chow, it is a relish we hillbillies eat with our pinto beans.
I had copied some recipes from Alton Brown on Good Eats, one of my favorite hosts and shows. They were both what you would call "Quick Pickles" that do not require all the elaborate canning processes. Basically put the vegetable in the jar, pour the "brine" over it, and let it sit in the fridge for a couple of weeks. These will not keep on the shelf in your cupboard through the year. Here is a picture of what he calls "Fire Crackers" the recipe is down below. I am also including his easy Bread and Butter Pickles. The two recipes are similar in the brine. Both take two weeks to set.Speaking of which, I have discovered a wonderful resource for recipes... it's something called the internet. Invented by Al Gore to provide folks with recipes for cooking nearly anything, and to see pictures of naked ladies. I found nearly a million yellow squash recipes, and nearly all of them were the same. OK a few variations here and there, but basically the same. I figured I could pretty much cobble up my own version from these files... recipe files, not naked lady ones.
The first one I made was a Yellow Squash Relish. I had no idea how this would taste but I thought I'd give it a try. Keep in mind, in addition to the squash I also got zucchini, cucumbers, green peppers, onions, etc. so I would have a vast array of ingredients to choose from. Of course the only problem remaining would be the spices. Now I keep, on-hand, a fairly decent collection of spices, but I did not have turmeric, mustard seeds, celery seeds, and so-on. This was where it ran into money, also I needed jars, lids, and caps. I got all my spices for under $20 and they will do me for a while, (my mother had a bottle of garlic powder for around 17 years, she cooked very plain). Below is the recipe.Yellow Squash Relish
4 cups squash and/or zucchini (diced)
1 cup onion (diced)
½ cup red bell pepper
1 cup white vinegar
1 ½ cup white sugar
1 tsp celery seeds
1 tsp mustard seeds
1 tsp turmeric
½ tsp hot pepper flakes
¼ cup kosher salt
1 cup water
Cut the yellow squash and zucchini, in quarters, lengthwise. Remove the seeds and dice them extremely small. I dice up 2 cups of squash and 2 cups of the zucchini. Chop one onion into small dice, it should be a cup, as well as a red or green bell pepper, use about half a cup. Red looks better.
Place in a large bowl and sprinkle ¼ cup salt and add 1 cup water. Stir well and let stand 1 hour in the refrigerator. Drain well and rinse with cold water twice. Transfer this into a couple of jars. Bring vinegar, sugar, and all remaining ingredients in a pot and bring to a boil. Pour hot mixture over vegetables in the jars. Let cool then refrigerate, then use as needed. By the way, you can slice the squash and make these in a more traditional method.
Fire Cracker Carrots
1 cup water
1 cup sugar
1 ½ cider vinegar
1 tsp onion powder
½ tsp mustard seed
1 ½ tsp salt
1 tsp chili flakes
2 dry chilis
1 lb baby carrots
Combine all ingredients, except the carrots and dry chilis, in a saucepan, bring to a boil, and simmer for 10 mins. Place the dry chilis on top and pour the brine over the carrots already in the jar, seal and refrigerate for 2 weeks. I used split green serrano peppers instead of the dried red chilis.
Bread & Butter Pickles1 cup water
1 cup vinegar
1 ½ cup sugar
1 tbs salt
½ tsp mustard seed
½ tsp turmeric
½ tsp celery seed
½ tsp pickling spice
2 med cucumbers
½ onion (sliced)
Slice the cucumbers and the onion into thin slices. Place in a jar. Combine all brine ingredients in a saucepan, bring to a boil, and simmer for 10 mins. Pour over the cucumbers and onions already in the jar, seal and refrigerate for 2 weeks.
Last year I did a post about a great restaurant in Charleston called Jestines. I fell in love with her Icebox Pickles, so I had to make those too! You can see by the picture they're fairly light and require only 48 hrs. to set. Here is the amazingly easy recipe. Jestine's Icebox Pickles
6 small cucumbers
1 tsp sugar
1 tbs kosher salt
1 tsp dried dill
1 cup white or apple cider vinegar
½ cup water
1 tsp. red pepper flakes
Slice cucumbers and place in a clean, heat proof container. Add sugar, salt, herbs and pepper flakes. Heat vinegar and water to a low boil; pour over cucumbers. Refrigerate for 48 hours.
Try these recipes out and let me know how they go. I like these because they do not require all the canning equipment, weather forecasts, witchcraft, and almanacs just to turn out a pickle or two. I had fun making these and will have even more fun enjoying these and giving some away. Alright now, get to picklin'.
RouxBDoo
Subscribe to:
Posts (Atom)